
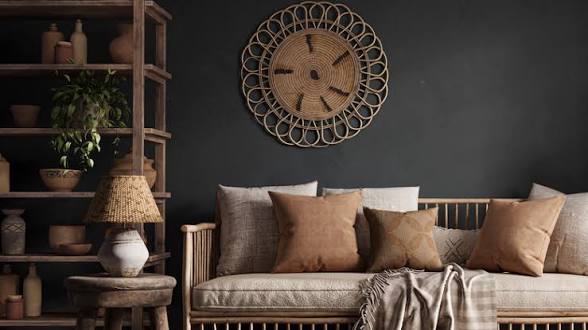
The world of interior design has undergone a quiet but powerful transformation. The once popular look of stark white spaces that felt cold and clinical is gradually giving way to something warmer, deeper, and more connected to nature. In its place, a more grounded and timeless aesthetic is emerging, one that embraces texture, character, and a sense of life within the home. At the center of this shift is the growing popularity of limewash.
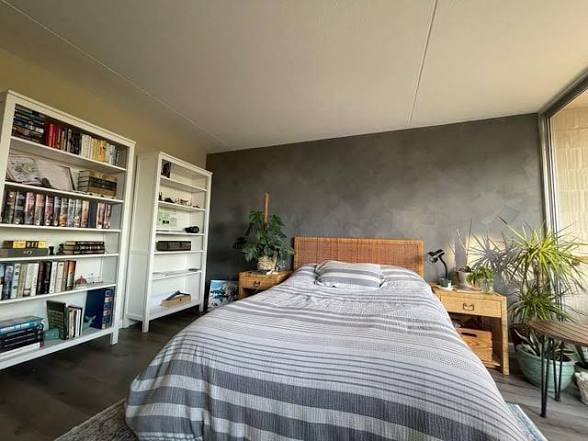
Limewash is not just another wall finish. It is an age old technique that has been rediscovered and refined for modern living. Unlike conventional paints that sit on the surface like a sealed layer, limewash interacts with the wall itself. It becomes part of the surface, creating a soft and velvety texture that reflects light in a subtle and almost glowing way. The result is a finish that feels calm, organic, and deeply inviting.
Below is a detailed and practical guide to understanding and applying limewash in your space, helping you create a home that feels like a true sanctuary.
Why Limewash Stands Out: The Natural Advantage
The beauty of limewash goes far beyond appearance. It offers several functional benefits that improve both the look and the health of your home.
Get TikTok SEO Cheat here
First, limewash is breathable. This means that it allows moisture to pass through the walls instead of trapping it inside. In many homes, trapped moisture can lead to dampness, mold, and unpleasant odors. With limewash, the walls are able to regulate moisture naturally, creating a healthier indoor environment.
Second, it is naturally hypoallergenic. Lime has a high alkaline level, which gives it antibacterial and antiseptic properties. This makes it resistant to dust mites and harmful microbes. As a result, limewash is an excellent choice for bedrooms, children’s rooms, and any space where air quality is important.
Third, limewash embraces imperfection in a way that feels authentic and artistic. As it dries and reacts with air, it undergoes a natural transformation process where it slowly turns back into stone. This creates a soft, cloud like pattern across the wall. No two walls will ever look the same, and that uniqueness is exactly what makes limewash so appealing.
Phase One: Preparing the Surface Properly
Before applying limewash, preparation is essential. Since limewash is a natural and reactive material, it needs the right surface to bond effectively.
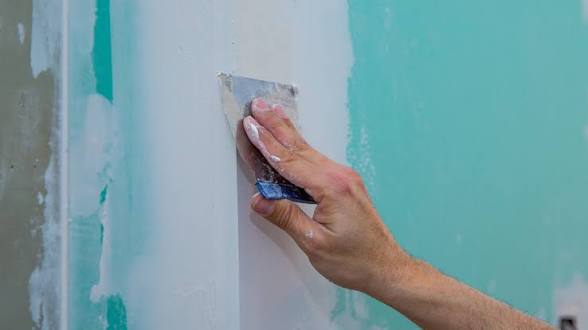
Start by cleaning the wall thoroughly. Use a gentle detergent that does not contain harsh chemicals. This removes dust, grease, and any residue that could prevent proper adhesion. A clean surface ensures that the limewash will settle evenly.
Next, address the issue of surface compatibility. If your wall has been painted with standard modern paint, it is likely non porous. Limewash cannot bond properly to such surfaces. To solve this, you need to apply a mineral based primer often referred to as a lime prep coat. This primer creates a slightly textured surface that allows the limewash to grip effectively.
Read More On:
- Nigeria Faces Inflation Uncertainty Despite Recent Economic Gains.
- How To Smarter Living in 2026: The Systems Changing How We Work and Live
- “Admin Night” Productivity: How to Turn Boring Chores into High-Focus Power Sessions
- Naira vs Dollar: A Steadier Finish to Q1 in the Cardoso Era
- From Business Deals to Prison Cell: Idowu Gets 30 Years for Fraud
After priming, inspect the wall for holes or cracks. Fill these areas with a breathable filler that is compatible with mineral finishes. Avoid using synthetic fillers whenever possible, as they may absorb the limewash differently and create visible patches after application.
Phase Two: Mixing and Understanding the Material
Limewash behaves very differently from regular paint. It is a liquid mixture made from lime and water, and it has a much thinner consistency.
Because the lime particles settle over time, you must stir the mixture regularly during use. Ideally, stir every ten to fifteen minutes to keep the texture consistent throughout your application.
You may also choose to dilute the limewash slightly with water. This creates a softer and more transparent finish. However, it is important to test this on a small section first. Limewash dries much lighter than it appears when wet, often several shades lighter. Always allow your test patch to dry completely before making a final decision.
Phase Three: Applying the Limewash
The application process is where limewash truly comes to life. It is not applied like standard paint, and the technique plays a major role in the final look.
Use a wide masonry brush with thick bristles. This type of brush holds more liquid and allows for the textured finish that limewash is known for.
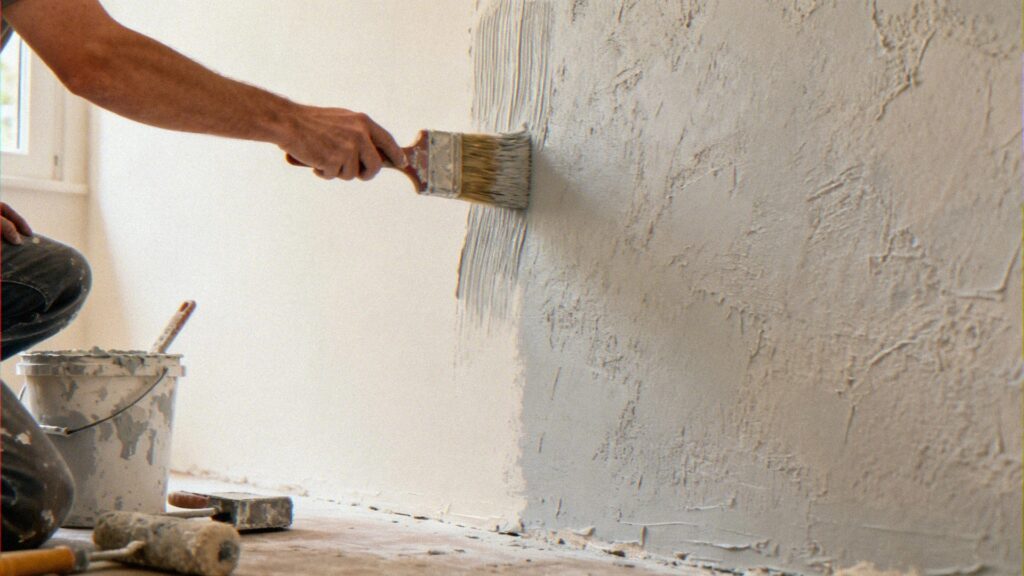
Before you begin, lightly dampen the wall using a spray bottle. This step slows down the drying process and allows the limewash to spread more smoothly across the surface.
Apply the limewash using broad and overlapping motions. Instead of straight lines, use a crisscross pattern. This layering technique creates depth and movement, which gives the wall its signature soft and cloudy appearance.
Work in small sections and keep a consistent pace. Always maintain a wet edge by blending each new section into the previous one before it dries. This prevents visible lines or uneven patches.
Read More On:
- Nigeria Releases Oil and Gas Reserves Data with Fresh Insights
- Lenovo Legion 5i Gen 10: The Mid Range Champion
- The Complete Guide to Nigerian Network Updates for Data and Airtime in 2026
- No Resignation: Adebayo Adelabu Dismisses Viral Claims
- Apple’s Biggest Design Mistake Is About to Disappear
Do not be discouraged by the first coat. It will likely look uneven and patchy. This is completely normal. Limewash builds its character gradually. The second and third coats are what bring out the richness and balance of the finish.
Phase Four: Drying, Curing, and Long Term Care
Limewash does not simply dry like ordinary paint. It goes through a curing process where it reacts with carbon dioxide in the air and slowly hardens into a stone like surface.
Allow at least twenty four hours between each coat. This gives the material enough time to settle and develop properly.
If you notice a mark or damage later on, avoid trying to fix only that small area. Limewash does not blend easily in spot repairs. Instead, apply a light and diluted coat over the entire section to maintain a consistent look.
In areas that experience more wear such as kitchens or bathrooms, you may choose to apply a mineral based sealer. This makes the surface easier to clean while preserving the natural texture. However, sealing slightly reduces the breathable quality of the limewash, so it should be used only where necessary.
Styling Tips for a Refined Finish
To make the most of limewash in your home, consider these design approaches:
- Use similar tones for walls and trims to create a soft and continuous visual flow. The texture of the limewash will provide enough contrast on its own.
- Layer colors thoughtfully. Applying a lighter base and a slightly darker top layer creates a subtle depth that gives the wall a gentle glow.
- Pay attention to lighting. Limewash interacts beautifully with both natural and artificial light. Observe how it looks at different times of the day before finalizing your choice.
Final Thoughts
Choosing limewash is more than just a design decision. It is a shift in mindset. It represents a move away from artificial finishes and toward materials that age gracefully and interact with their environment.
When you use limewash, your walls become more than just a background. They become a living surface that changes with light, time, and atmosphere. The imperfections tell a story, the texture adds warmth, and the overall effect transforms your home into a space that feels calm, natural, and deeply personal.
In a world that often values perfection, limewash reminds us that true beauty lies in authenticity and character.
Read More On: