

In the world of do it yourself, creativity has taken a refreshing turn. Instead of chasing flawless finishes and factory level precision, people are now embracing individuality and authenticity. This shift is part of a larger lifestyle movement that values sustainability, intentional living, and meaningful creation.
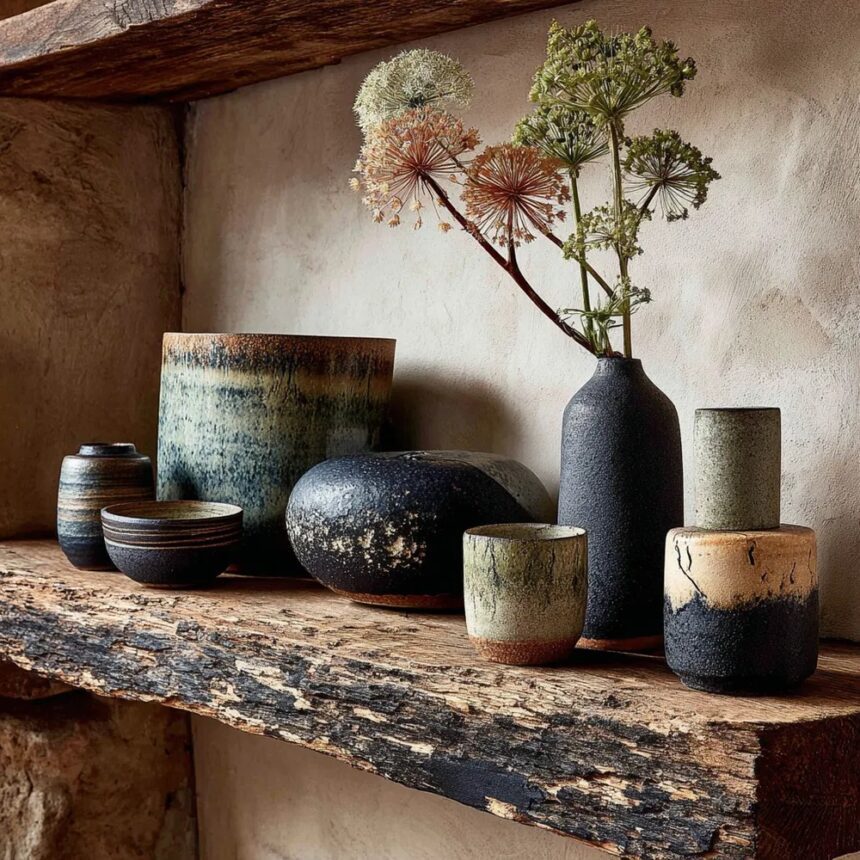
One of the most exciting expressions of this trend is the growing love for Wabi-Sabi inspired ceramics. This approach celebrates objects that are imperfect, natural, and deeply personal. Rather than hiding flaws, it highlights them as part of the story behind each piece.
Today, some of the most admired kitchen items are no longer mass produced. They are handmade, shaped slowly, and often carry visible marks left by the creator. These marks are not mistakes. They are proof of human touch and creativity.
This guide walks you through how to create three essential kitchen items using simple hand building techniques. These include irregular spoon rests, pinch style salt bowls, and organic bud vases. Each piece is designed to be both functional and expressive.
Get TikTok SEO Cheat here
Understanding the Wabi Sabi Mindset
Before working with clay, it is important to adopt the right mindset. This philosophy is not about perfection. It is about appreciating natural beauty in its raw and unfinished form.
Key ideas to keep in mind
- Accept uneven shapes and surfaces
- Allow natural textures to remain visible
- Focus on forms inspired by nature such as stones, leaves, or shells
- Avoid over refining or polishing your work
Why this matters
- It removes the pressure to be perfect
- It encourages creativity and freedom
- It makes each piece truly unique
One of the most beautiful aspects of this approach is leaving behind subtle impressions from your hands. These small details make your work impossible to replicate by machines.
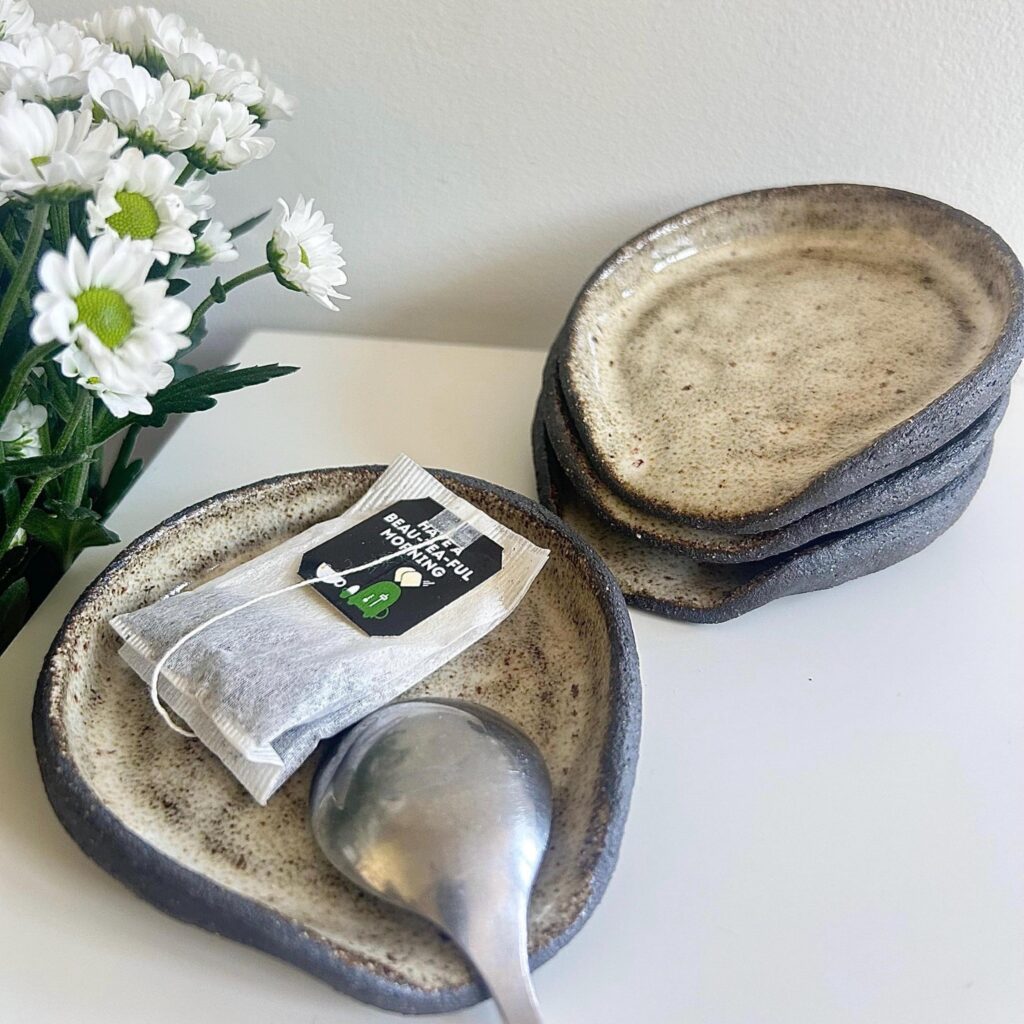
Step One: Creating an Irregular Spoon Rest
The spoon rest is a great starting point because it is simple and practical. It also allows you to explore shaping and texturing techniques.
How to begin
- Roll out a flat piece of clay to a moderate thickness
- Instead of using a cutter, shape it freely using your hands or a simple tool
- Aim for a loose and uneven outline that feels organic
Shaping the form
- Gently lift the edges using your fingers to create a shallow surface
- Keep the edges uneven so that some parts are higher than others
- Press a spoon lightly into the center to create a natural resting space
Adding details
- Place a small object under one side while it dries to create a slight tilt
- Press fabric or plant materials onto the surface to create subtle textures
Final result
You will have a spoon rest that feels natural and handmade, with soft curves and visible character.
Read More On:
- Africa Technology Expo Targets Massive Deal Growth in Lagos.
- Motorola Razr Ultra: The New Gold Standard for Flip Phones
- How To Smarter Living in 2026: The Systems Changing How We Work and Live
- “Admin Night” Productivity: How to Turn Boring Chores into High-Focus Power Sessions
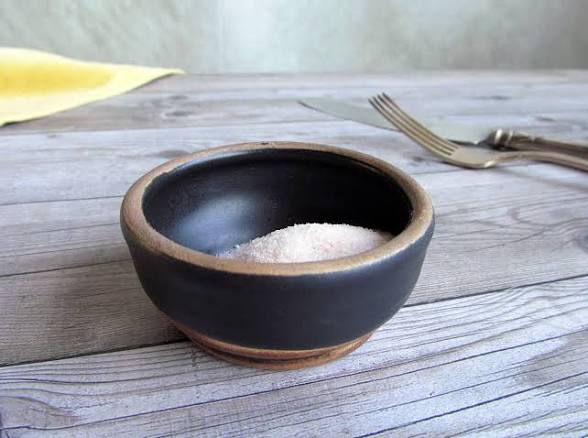
Step Two: Making a Pinch Style Salt Bowl
Small bowls for salt and spices are becoming popular because they are easy to use and add a tactile experience to cooking.
Starting the shape
- Roll a small ball of clay in your hands
- Press your thumb into the center while holding it steady
Forming the bowl
- Slowly rotate the clay while gently pinching the sides
- Keep the walls even but not perfectly smooth
Enhancing the texture
- Use your fingers or knuckles to create slight indentations
- Allow the rim to remain uneven instead of flattening it
Why this design works
- The uneven edge makes it easier to pick up salt or spices
- The textured surface reflects light in a beautiful way
- The bowl feels comfortable and natural to hold
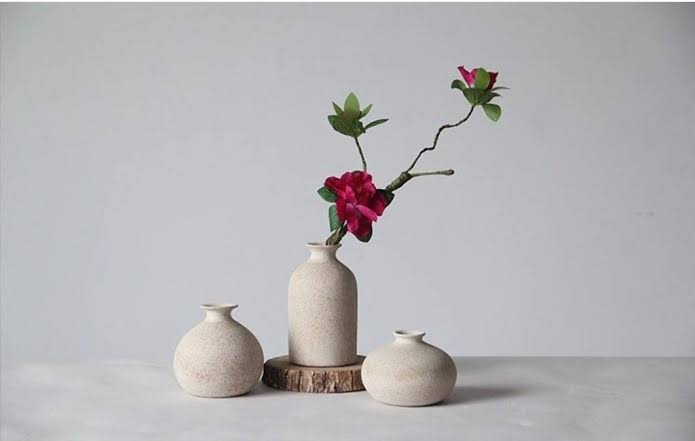
Step Three: Crafting an Organic Bud Vase
Bud vases in 2026 are small, artistic, and often resemble natural objects. They are designed to hold a single flower or a few stems.
Building the base
- Begin with a small pinch formed cup to create the bottom
- Ensure the base is stable and thick enough to support the structure
Adding height
- Roll thin strips of clay and place them around the top edge
- Blend each layer gently into the base to secure it
Shaping the form
- Gradually build upward while slightly narrowing the opening
- Allow the surface to remain textured rather than smoothing it completely
Final touches
- Keep the top edge slightly uneven
- Let the overall shape feel organic rather than symmetrical
Read More On:
- Nigeria Releases Oil and Gas Reserves Data with Fresh Insights
- Lenovo Legion 5i Gen 10: The Mid Range Champion
- The Complete Guide to Nigerian Network Updates for Data and Airtime in 2026
- No Resignation: Adebayo Adelabu Dismisses Viral Claims
- Apple’s Biggest Design Mistake Is About to Disappear
Step Four: Finishing with Natural Glazing Techniques
The finishing stage is where your piece gains depth and character. In 2026, the focus is on soft, earthy finishes rather than shiny or overly polished surfaces.
Popular finishing approaches
- Apply glaze only to certain areas and allow it to flow naturally
- Leave some parts uncoated to highlight the raw clay
- Use darker tones to settle into textured areas and enhance details
Creative ideas
- Add subtle speckles to mimic natural stone
- Use gentle color tones such as beige, clay brown, or muted green
- Avoid overly bright or artificial looking finishes
Preparing Your Pieces for Use
If your items will be used in the kitchen, proper finishing is important for safety and durability.
Options available
- Use air dry clay for decorative items that do not come into contact with food
- For functional kitchen items, choose materials that can be properly fired
Firing your work
- Look for local pottery studios that offer kiln services
- Many communities now provide shared access to firing equipment
Care instructions
- Wash your handmade items gently by hand
- Avoid exposing them to extreme heat or harsh cleaning methods
The Meaning Behind Handmade Pieces
When your work is complete, you will have more than just kitchen tools. Each piece carries a story. Every curve, mark, and texture reflects a moment of creativity and intention.
In a world filled with mass produced goods and digital perfection, handmade ceramics stand out as something real and meaningful. They remind us that beauty does not have to be flawless. It only needs to be honest.
By embracing this approach, you are not just creating objects. You are creating experiences, memories, and a deeper connection to the things you use every day.
Read More On:
- Nigeria Faces Inflation Uncertainty Despite Recent Economic Gains.
- How To Smarter Living in 2026: The Systems Changing How We Work and Live
- “Admin Night” Productivity: How to Turn Boring Chores into High-Focus Power Sessions
- Naira vs Dollar: A Steadier Finish to Q1 in the Cardoso Era
- From Business Deals to Prison Cell: Idowu Gets 30 Years for Fraud