
The world of digital content creation has evolved into a powerful global industry where voices now carry as much influence as visuals. Podcasts, interview shows, educational discussions, storytelling channels, and commentary platforms are rapidly becoming the preferred way audiences consume information while driving, working, exercising, or relaxing at home. This massive rise in audio consumption has created an opportunity for aspiring creators to build highly engaged communities without needing a massive production budget or a luxurious studio space.
For many beginners, however, the biggest challenge is knowing where to start. The internet is filled with conflicting advice, expensive recommendations, and highly technical explanations that often leave new creators confused before they even record their first episode. Some people believe they need expensive studio mixers, advanced cameras, soundproof booths, and professional engineering knowledge just to sound good. That assumption discourages countless talented voices from ever starting.
The truth is far simpler.
Creating a professional sounding podcast is not about owning the most expensive equipment. It is about understanding how audio works, choosing beginner friendly tools wisely, and learning how to maximize the environment you already have. A small setup used correctly can produce cleaner audio than a costly studio used poorly. Many successful podcasters built their audiences using simple microphones inside bedrooms, closets, or quiet corners of their homes.
Get TikTok SEO Cheat here
This guide on the best podcast equipment for beginners is designed as a practical step by step roadmap rather than a product review. Instead of overwhelming you with unnecessary technology, it focuses on helping you understand why each piece of equipment matters and how to use it effectively. Whether you want to launch a personal podcast, conduct interviews, start a faith based discussion show, create educational content, or build a media brand from home, this guide will help you assemble a professional beginner setup without wasting money.
You will learn how microphones capture sound, why monitoring audio matters, how recording software works, and what simple environmental adjustments can dramatically improve your sound quality. More importantly, you will discover how to build a scalable setup that grows alongside your content journey.
Understanding the Foundation of Good Podcast Audio
Before buying any equipment, it is important to understand one critical principle.
Good podcast audio is built on three major foundations:
| Foundation | Purpose | Why It Matters |
|---|---|---|
| Microphone | Captures your voice | Determines clarity and warmth |
| Headphones | Allows real time monitoring | Helps detect problems instantly |
| Software | Records and edits audio | Shapes the final polished output |
If even one of these elements is poor, your overall production quality suffers.
A powerful microphone with terrible recording software still creates problems. Excellent software cannot repair severely distorted audio. High quality headphones become useless if your microphone constantly captures background noise.
Understanding how these three systems work together is the first step toward building an efficient studio.
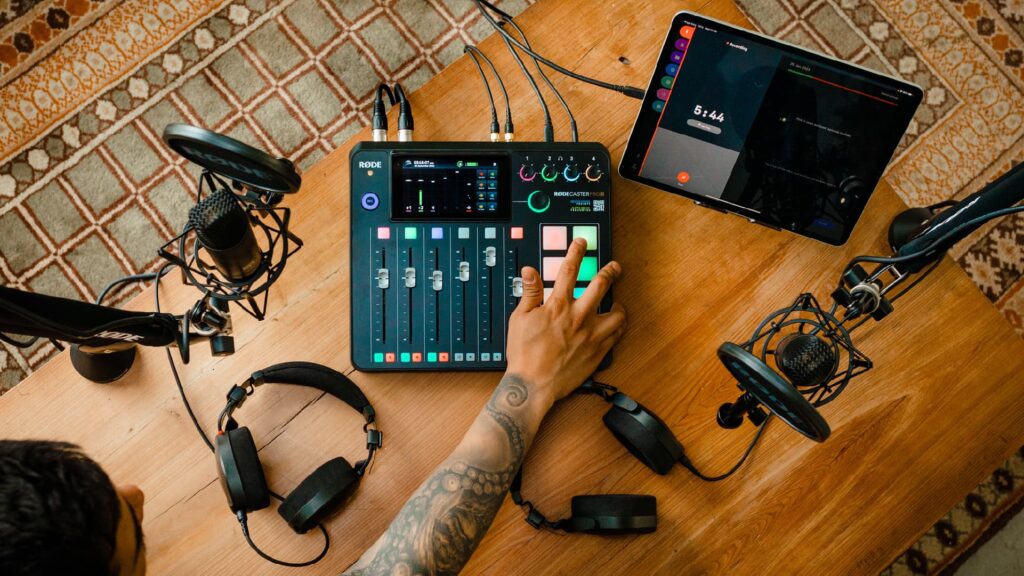
Step One: Choosing the Right Microphone
Your microphone is the heart of your entire podcast setup. It directly affects how your audience experiences your voice.
For beginners, selecting the right microphone can feel confusing because there are countless options online. However, the process becomes easier when you focus on two important decisions.
Understanding USB and XLR Microphones
USB Microphones
USB microphones are designed for simplicity. They connect directly into your computer through a USB cable and begin working almost immediately.
This makes them ideal for beginners because they remove the need for additional hardware.
Benefits of USB Microphones
| Advantage | Explanation |
|---|---|
| Easy setup | Plug directly into your laptop |
| Budget friendly | No extra interface required |
| Portable | Ideal for mobile creators |
| Beginner friendly | Minimal technical knowledge needed |
USB microphones are perfect for solo podcasters, students, remote workers, and creators building their first setup.
XLR Microphones
XLR microphones are more advanced and are commonly used in professional studios. Instead of plugging directly into your computer, they require an audio interface to process the sound.
While they offer greater flexibility and studio level expansion, they also increase complexity and cost.
For most beginners, starting with USB is the smarter option.
Understanding Dynamic and Condenser Microphones
This is one of the most important decisions for home podcasters.
Condenser Microphones
Condenser microphones are extremely sensitive. They capture detailed vocal textures and subtle frequencies beautifully.
Unfortunately, they also capture unwanted sounds.
That means your fan noise, traffic sounds, keyboard clicks, room echo, and air conditioning hum may become painfully obvious.
If your room is untreated, condenser microphones can become frustrating.
Dynamic Microphones
Dynamic microphones are far more forgiving.
They focus mainly on the sound directly in front of them while rejecting surrounding noise. This makes them ideal for bedrooms, apartments, and untreated home offices.
For beginners recording at home, dynamic microphones are usually the best choice.
Recommended Beginner Microphones
Samson Q2U
The Samson Q2U is widely respected because it combines simplicity with long term flexibility.
It supports both USB and XLR connections, allowing beginners to start simple while still leaving room for future studio upgrades.
Why It Works for Beginners
| Feature | Benefit |
|---|---|
| Dual connectivity | Works with both laptop and professional mixer |
| Dynamic capsule | Reduces room noise |
| Included accessories | Saves extra spending |
| Warm vocal tone | Produces radio style voice quality |
Audio Technica ATR2100x USB
The Audio-Technica ATR2100x-USB is another excellent beginner option.
It delivers clean vocal clarity, modern USB C connectivity, and excellent noise rejection for home creators.
This microphone is especially useful for creators who want portability alongside professional sound.
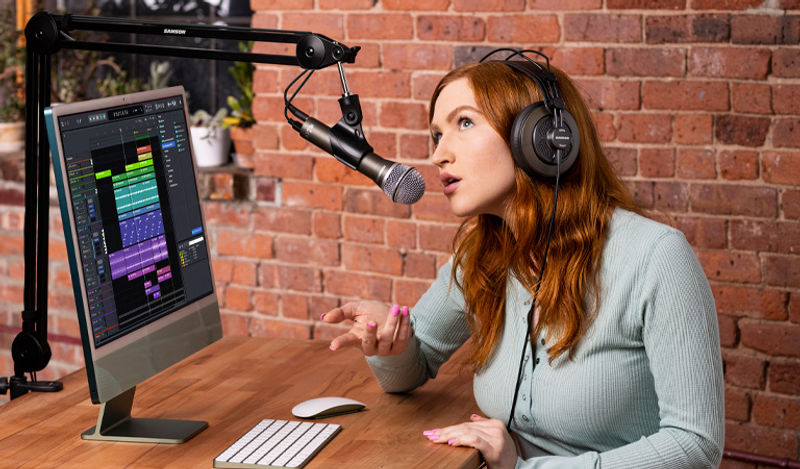
Step Two: Using Proper Monitoring Headphones
One of the biggest beginner mistakes is recording without monitoring audio properly.
You must hear what your microphone hears.
Without headphones, you may not notice background hiss, distorted levels, microphone rubbing, or accidental interruptions until after recording.
Why Bluetooth Headphones Are a Problem
Wireless headphones introduce audio delay known as latency.
This delay creates a distracting echo effect while speaking, making it harder to maintain natural conversation flow.
Consumer earbuds also exaggerate bass and treble frequencies, meaning they do not provide an accurate representation of your recording.
Why Closed Back Headphones Matter
Closed back headphones prevent audio leakage.
This means sound stays inside the ear cups instead of escaping into the microphone.
They also improve focus during editing sessions by reducing outside distractions.
Recommended Beginner Headphones
Audio Technica ATH M20x
The Audio-Technica ATH-M20x offers excellent clarity for beginners without becoming overly expensive.
They are comfortable for long editing sessions and provide balanced audio for voice monitoring.
Sony MDR 7506
The Sony MDR-7506 is considered an industry standard in radio and broadcasting environments.
Their lightweight design and highly accurate sound reproduction make them excellent for long production sessions.
Step Three: Choosing Recording Software
Recording software is your digital studio.
This is where you capture, trim, organize, clean, and export your episodes.
Best Beginner Software Options
| Software | Best For | Major Strength |
|---|---|---|
| Audacity | Beginners on any computer | Free powerful editing |
| GarageBand | Apple users | User friendly workflow |
| Riverside | Remote interviews | High quality online recording |
| Zencastr | Guest conversations | Cloud based recording |
Step Four: Essential Accessories
Accessories may seem optional, but they dramatically improve sound quality.
Pop Filter
A pop filter reduces harsh bursts of air caused by words containing letters like P and B.
Without one, your recording may contain distracting low frequency thumps.
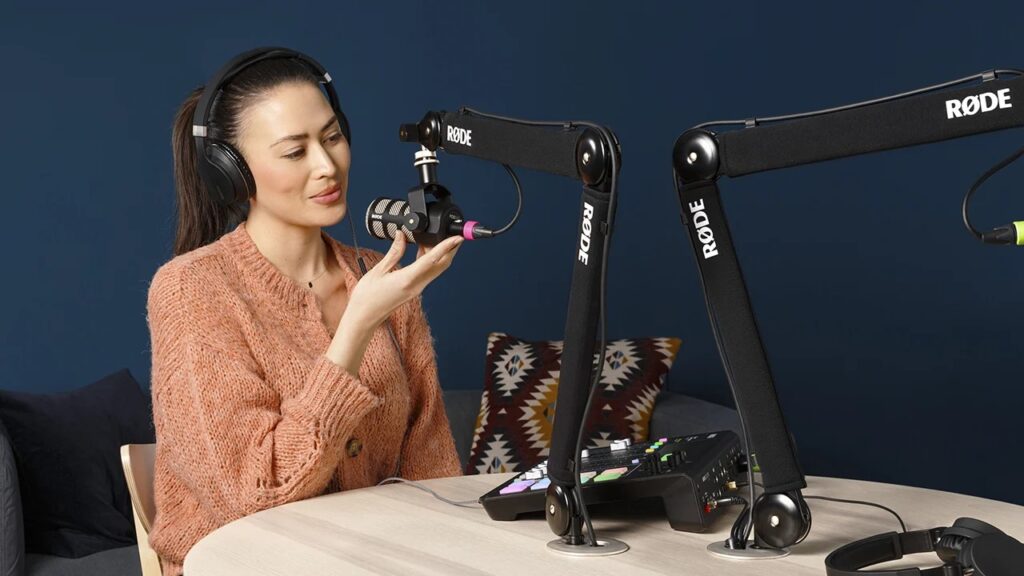
Boom Arm
A boom arm positions your microphone correctly while preventing handling noise.
It also improves comfort during long recording sessions.
Shock Mount
A shock mount isolates your microphone from vibrations caused by desk movement, typing, or accidental bumps.
Together, these accessories create a cleaner and more professional recording environment.
Step Five: Improving Your Room Acoustics
This is the most overlooked part of podcasting.
Even expensive equipment sounds poor inside echo filled rooms.
Hard surfaces reflect sound waves aggressively, creating hollow recordings.
Simple Acoustic Improvements
| Problem | Simple Solution |
|---|---|
| Echo | Close curtains |
| Hollow room sound | Add cushions or blankets |
| Floor reflections | Use carpet or rugs |
| Outside noise | Record during quieter hours |
Many successful podcasters began recording inside closets because hanging clothes naturally absorb sound reflections.
A well treated environment often improves audio quality more than buying expensive equipment.
Final Thoughts
Starting a podcast does not require perfection.
The most important step is beginning with a setup that is practical, reliable, and easy to use consistently. Instead of chasing expensive gear immediately, focus on learning microphone technique, improving room acoustics, monitoring your audio carefully, and building confidence behind the microphone.
The best podcast equipment for beginners is not necessarily the most expensive setup available. It is the equipment that allows you to create clear, professional sounding content consistently without technical frustration.
Once your workflow becomes comfortable and your audience grows, you can gradually upgrade your studio over time.
What matters most is your message, your consistency, and the clarity with which your audience hears your voice.
Read More On: