
Having a professional online presence is no longer an optional luxury but a fundamental necessity for any business or personal brand. Whether you are an entrepreneur in Lagos or a creative professional working from a home office in Ikorodu, the barrier to entry has officially vanished. You no longer need a deep pocket to pay a developer, nor do you need a computer science degree to understand complex backend scripts. The digital landscape has evolved into an era of democratization where high-quality tools allow anyone to launch a functional, aesthetically pleasing platform in the time it takes to finish a lunch break.
The common misconception that building a website is a weeks-long project involving heavy coding and credit card commitments is simply outdated. In the modern workspace, speed and utility are the primary currencies. This guide provides a strategic, step-by-step roadmap to building your digital home from scratch. We are stripping away the jargon and focusing on a technology solution that prioritizes your time and your budget. By following this blueprint, you will move from a blank screen to a published URL in less than sixty minutes, all without touching a single line of code or entering a CVV number.
Free Website Builders Comparison
Selecting the right platform is the most critical decision in this process. Different tools serve different operational needs. Below is a detailed breakdown of the top free contenders.
| Element | Wix | WordPress.com | Carrd | Google Sites |
|---|---|---|---|---|
| Best For | Creative Freedom | Long-form Content | One-page Portfolios | Internal Team Wikis |
| Learning Curve | Low to Medium | Medium | Very Low | Extremely Low |
| Storage | 500 MB | 1 GB | Limited | Shared with Drive |
| Ad-Free? | No (Wix Banner) | No (WP Banner) | Yes (Very Discreet) | Yes |
| Coding Needed | Zero | Zero | Zero | Zero |
Step 1: Selecting Your Digital Engine
The first fifteen minutes of your hour should be spent choosing your builder. For most beginners, Wix offers the most intuitive drag and drop experience. It allows you to move any element, text, images, or buttons, exactly where you want them on the screen. If you are a writer or want to start a news hub similar to Technology Times, WordPress.com is the industry standard for content management.
Get TikTok SEO Cheat here
For those who simply need a digital business card or a landing page for a specific product, Carrd is the fastest option available. It focuses on single-page sites that are mobile-responsive by default. Finally, Google Sites is the go-to for those who already use Google Workspace and want a clean, no-frills site that integrates perfectly with Google Drive and Docs.
Step 2: Choosing a Professional Template
Once you have signed up with just an email address, you will be prompted to pick a template. This is where many people get stuck, but the secret is to look for the structure, not the images or colors. You can change every photo and every font later.
Browse the categories, Consultancy, Photography, E-commerce, or Personal Blog, and pick a layout that matches the volume of information you have. If you have very little content, pick a minimalist template. If you have a lot of services to list, choose a layout with multiple sections. A professional template acts as your architectural blueprint; it ensures your site remains visually balanced even if you are not a graphic designer.
Step 3: Populating Your Content with Drag and Drop
This is the core of the project. Modern builders use a “What You See Is What You Get” (WYSIWYG) editor. You simply click on a block of text to change it or drag an image from your computer into the browser window.
- The Hero Section: This is the first thing people see. It should have a clear headline that explains what you do and a “Call to Action” button (e.g., “Contact Us” or “Learn More”).
- About Us: Keep this brief and professional. Explain the value you provide to your clients.
- Services/Products: Use high-quality images. If you do not have professional photos, use built-in libraries like Unsplash or Pexels, which are often integrated directly into the builder.
- Contact Info: Ensure your email and phone number are easy to find.
Step 4: Managing Domain and Identity Options
Since we are building a free website, you will not have a “Custom Domain” like www.yourname.com yet. Instead, you will receive a branded subdomain such as yourname.wixsite.com or yourname.wordpress.com.
While this might feel less professional for a large corporation, it is a perfectly valid starting point for a new project or a personal portfolio. The builders handle all the hosting and security (SSL certificates) automatically. This means your site will show the “Secure” padlock icon in browsers, which is vital for building trust with your visitors. You can always connect a custom domain later when your traffic begins to grow.
Step 5: Review and One-Click Publishing
In the final ten minutes, switch to the “Mobile View” in your editor. Most of your traffic will come from smartphones, so ensure your text is readable and your buttons are large enough to be clicked on a small screen.
Hit the Preview button to walk through the site as a visitor would. Check every link and every button. Once you are satisfied, click the Publish button. Your website is now live and accessible to anyone in the world. You have successfully bypassed the traditional technical hurdles and created a global platform in under sixty minutes.
Understanding the Limitations of Free Plans
While free builders are excellent for getting started, it is important to be realistic about their boundaries. Most free tiers include a small banner or “Made with Wix” advertisement at the top or bottom of the page. This is the trade-off for zero cost.
Furthermore, free plans usually have limited storage and bandwidth. If your site becomes extremely popular and starts receiving thousands of visitors daily, you may find the site loading slower. Free plans also lack professional email addresses (e.g., info@yourname.com) and advanced e-commerce features like direct credit card processing on your site.
When is it Time to Upgrade?
The beauty of this technology solution is that it scales with you. You should consider moving to a paid plan once your business starts generating revenue or when you hit these specific milestones:
- Branding Needs: When you feel the branded subdomain (e.g., .wixsite.com) is holding back your professional image.
- E-commerce Expansion: When you want to sell products directly and need integrated payment gateways for Nigerian or international customers.
- Advanced Analytics: When you need deep insights into where your traffic is coming from to optimize your digital marketing strategy.
- SEO Dominance: While free sites can rank on search engines, custom domains generally have a significant advantage in competitive niches.
Frequently Asked Questions
Can I really build a website for free?
Yes. Platforms like Wix and WordPress provide the hosting, the builder, and the subdomain at zero cost. You only pay if you want to remove ads or use a custom domain name.
Do I need to know any HTML or CSS?
Not at all. These tools are built for the average user. If you can use a smartphone or type a document in Word, you can build a website using these drag and drop editors.
Will my website show up on Google?
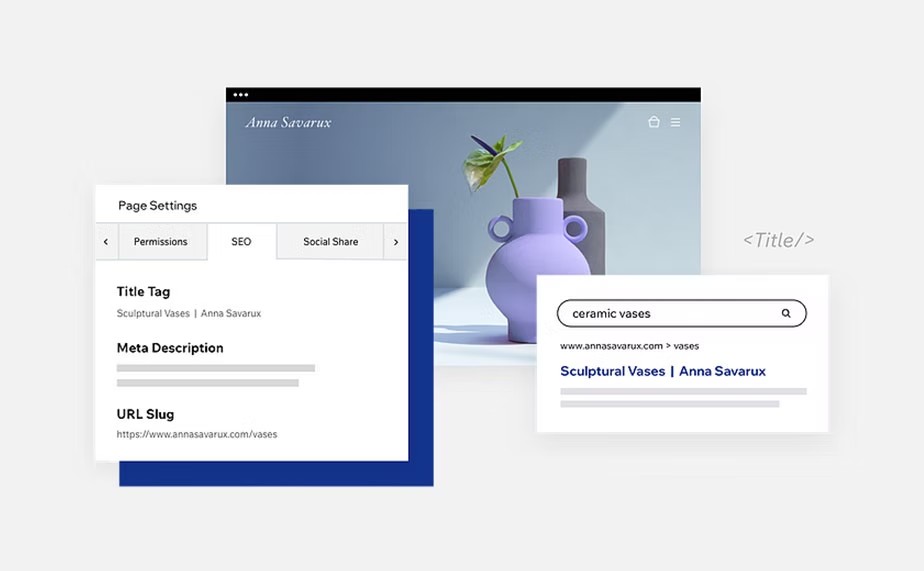
Yes. Most free builders include basic SEO tools that allow you to add “Meta Titles” and “Descriptions.” However, ranking highly for competitive keywords takes time and consistent content creation.
Can I change my builder later?
It is difficult to “move” a website from Wix to WordPress directly. You would generally have to rebuild the design, though you can copy and paste your text and images. This is why Step 1 is so important.
How do I get a professional email?
Professional emails usually require a custom domain. Once you upgrade and buy a domain, you can set up email forwarding or use a service like Google Workspace or Zoho Mail to get a customized address.
Read More On: